Forward fold is one of the most foundational postures in yoga asana. It’s an element of all sun salutations and is typically done towards the beginning of class to help lengthen the hamstrings, spine, and release tension from the head, neck, and shoulders.
Personally, I love forward folds. It’s one of my go-to poses when I’m struggling with a headache or general stress and anxiety. Because it’s technically an inversion, with your head lower than your hips, it brings a fresh supply of blood to your head and gives you the benefit of seeing the world with a new perspective.
Below are some tips to help make your forward folds feel better and more accessible. Don’t shy away from this pose just because you might have some tightness in the lower body—that’s why you need it! Use these adaptations and alignment cues to help find a forward fold that works for you and your body.
Have fun and enjoy!
Everything You Need to Know About Forward Folds
Sanskrit name: Uttanasana
Pose benefits: Calms the mind, eases anxiety, helps soothe headaches, decompresses the spine, deeply stretches the entire back chain of the body, builds strength in the feet
Precautions: Back injuries, herniated discs (always consult your doctor before beginning a new exercise program)
1. How to Begin Your Forward Fold
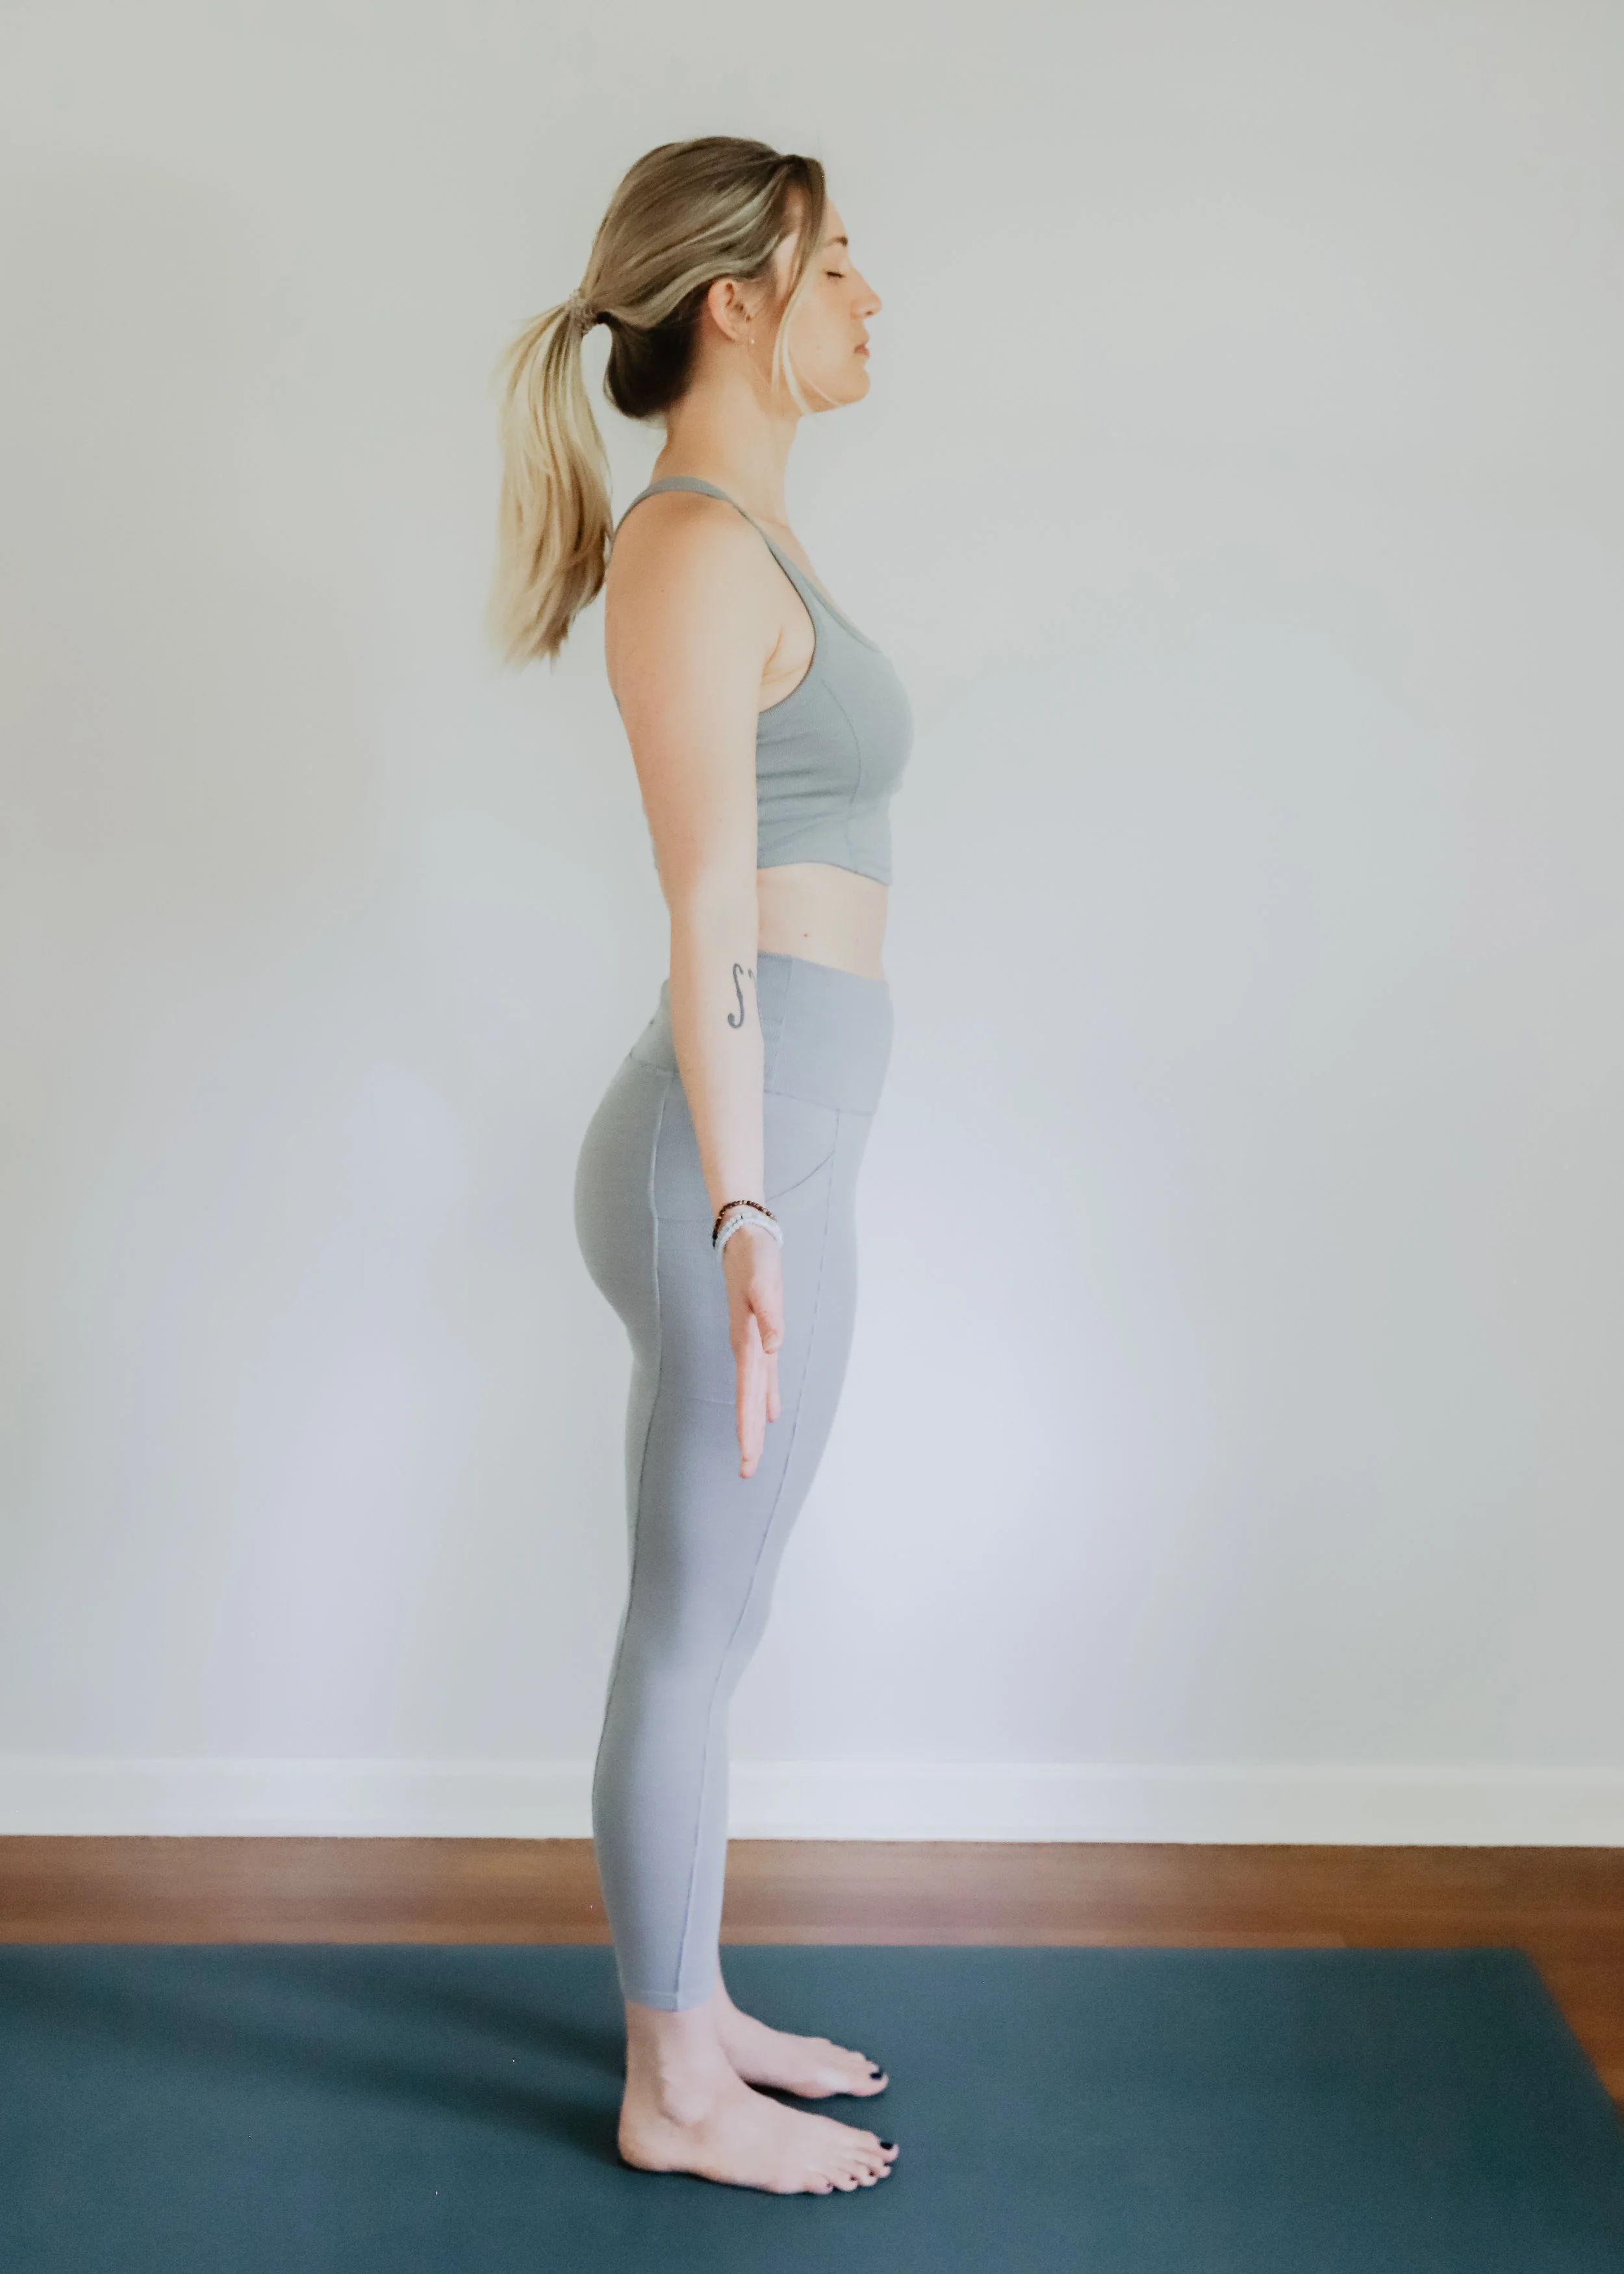
Start in mountain pose with your feet about hips distance apart and your arms out to the side—stand up nice and tall
Take a big inhale and sweep your arms overhead for length
On your exhale, begin to swan dive forward, hinging at the waist as you begin to fold your upper body over your legs towards the floor
Bend your knees A LOT on this first one—enough so that your hands can rest comfortably on the floor, on blocks framing your feet, or on the seat of a chair placed in front of you
2. How to Engage and Deepen the Pose
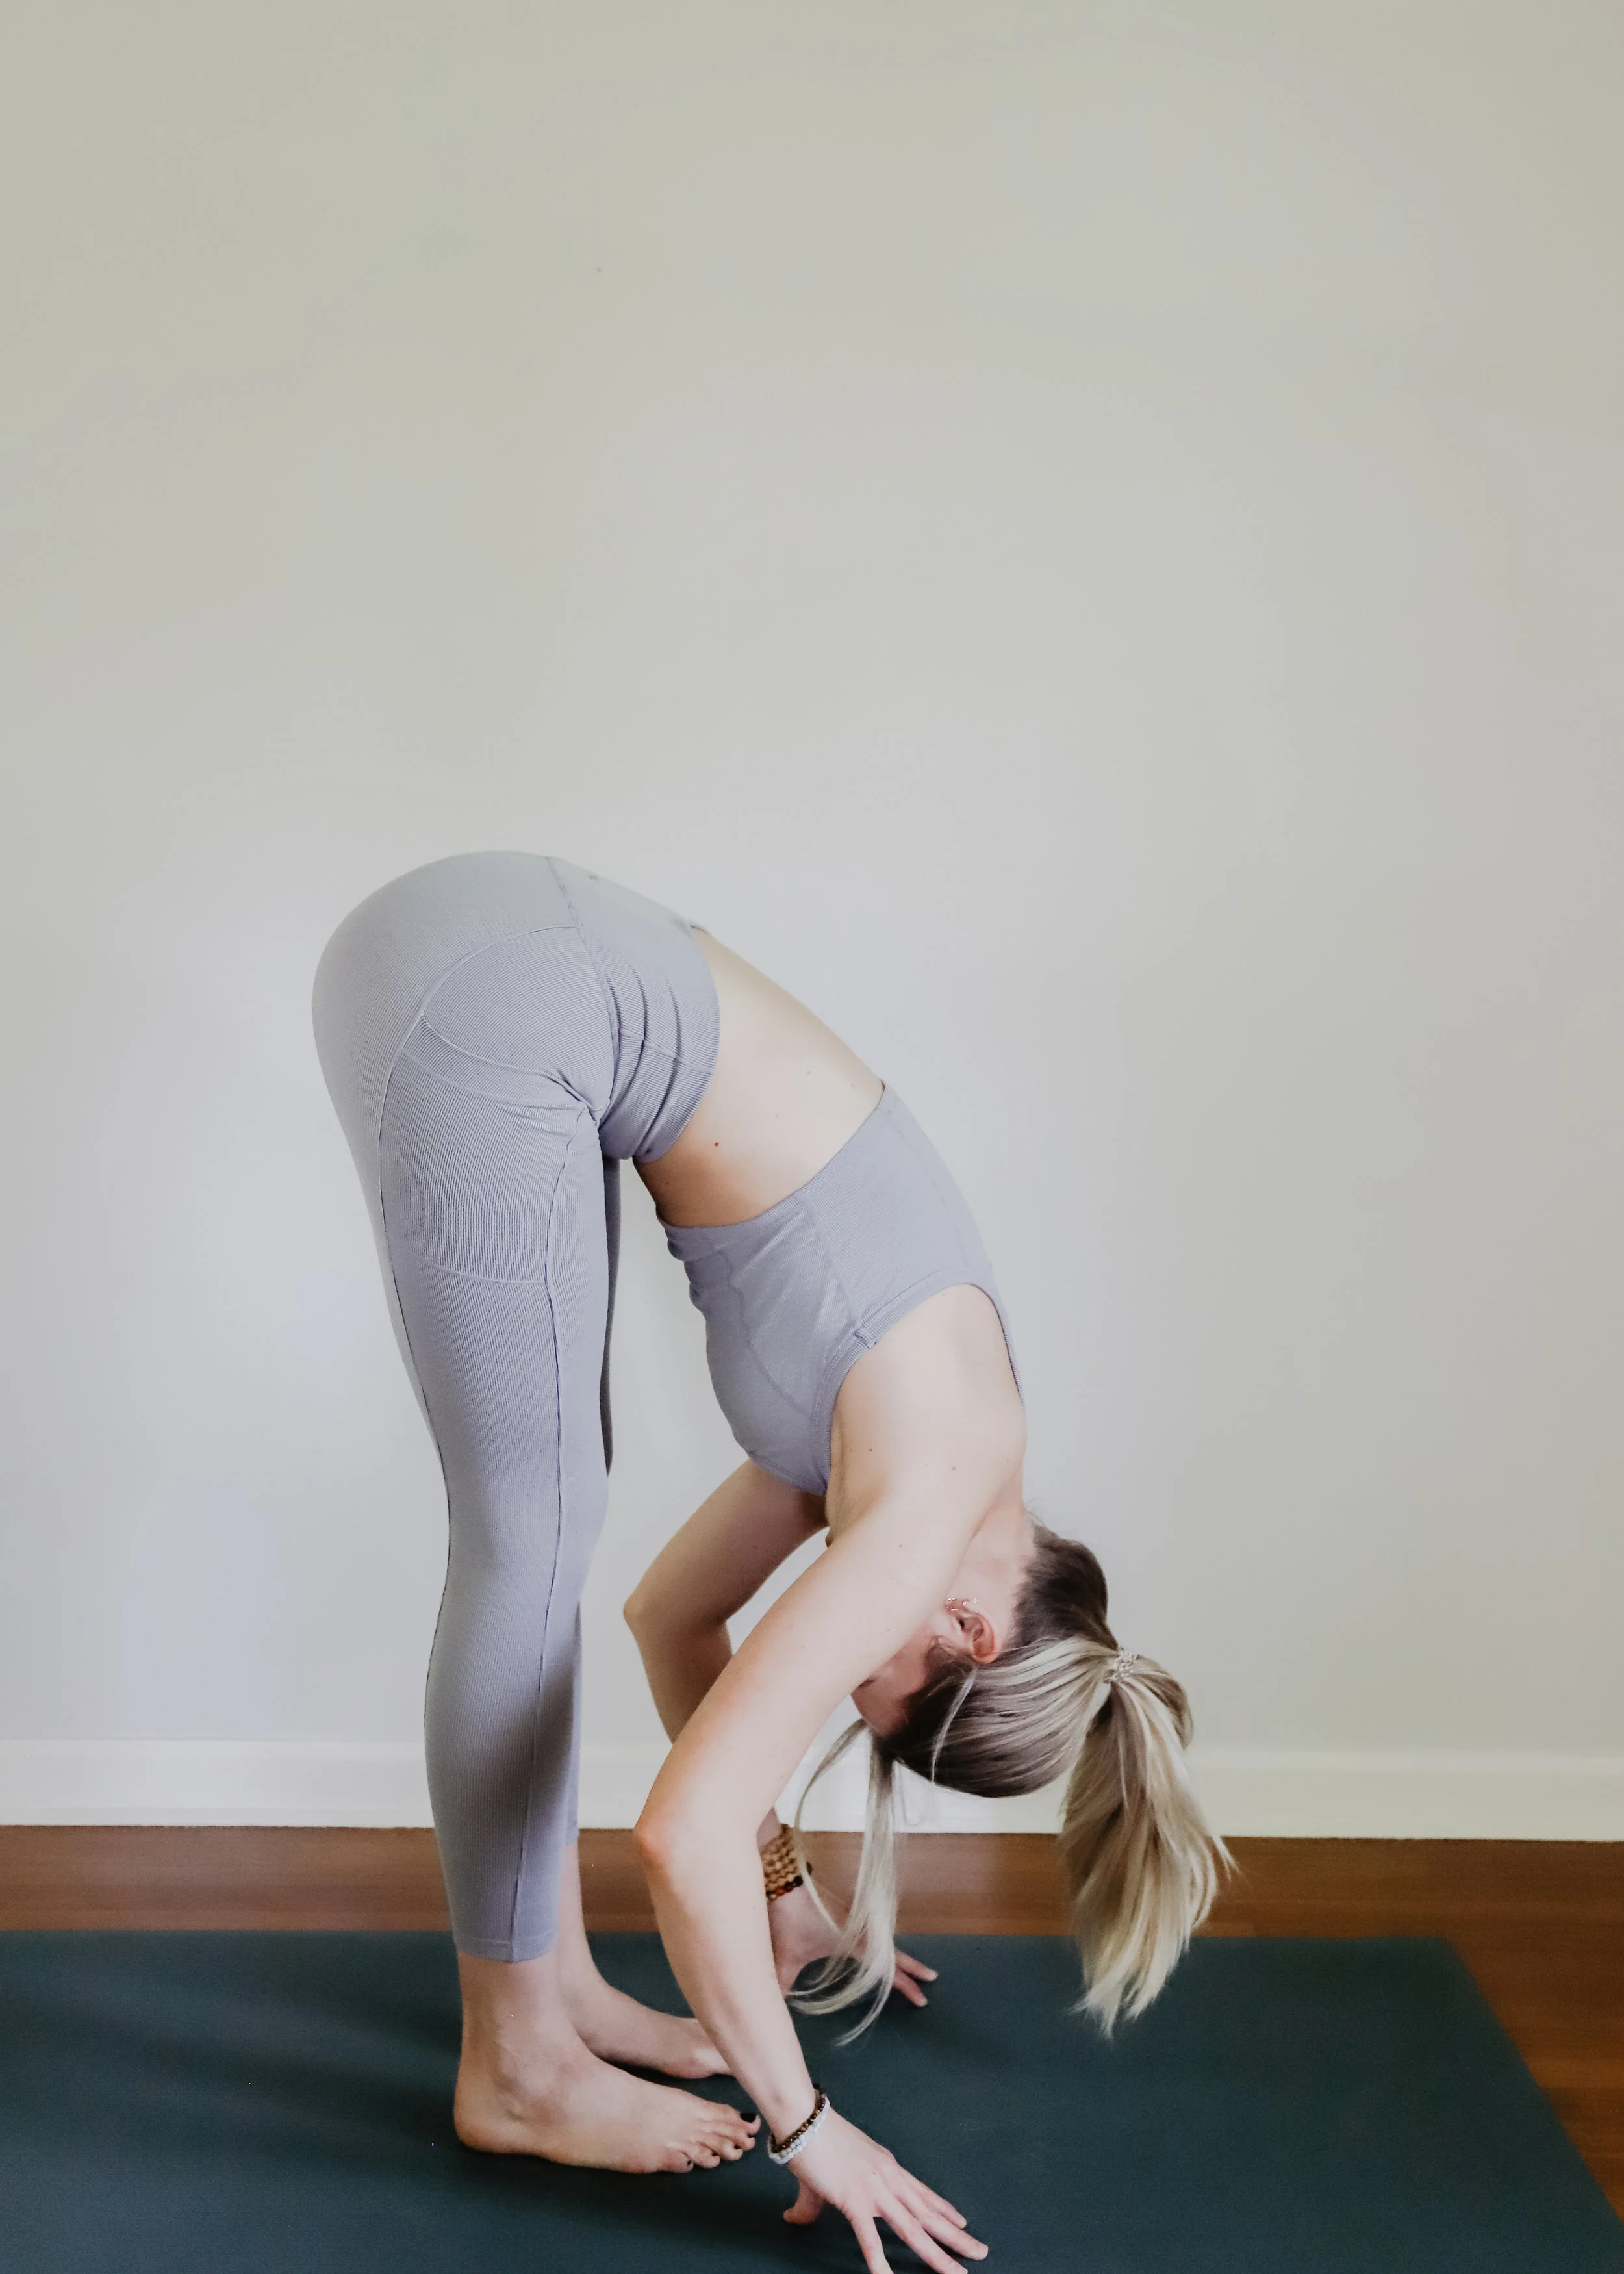
Root down through all four corners of your feet (both corners of your heels, your big toe ball mounds, and the pinky-side edges of your feet)
As you root down and grip the floor with your feet, imagine you’re pulling an upward current of energy out of the earth and through your feet and legs—this will help create a lift behind your knee caps and through your outer hips as tip your pelvis forward and reach your sit bones towards the sky
Keep as much of a bend in your knees as you like, keep tilting the pelvis forward
Legs are energized but not locked out—again, keep a little buoyancy in the knees
What should you do with your hands?
They can wrap around your ankles or calves
They can rest on the floor, blocks (or whatever you’ve got at home), or a chair place in front of you
You can clasp opposite elbows and rag-doll a bit back and forth
Allow your head, neck, and shoulders to full release—gaze is behind you; maybe allow the eyes to close as you relax and let your spine lengthen and unwind
3. Bonus Tips & Tricks
I can’t say it enough, don’t be afraid to bend your knees A LOT and ALWAYS :) you might even bend them so much that you can rest your torso on the tops of your thighs—this can feel really nice and can really help stretch the hamstrings
Experiment with taking a wider stance, especially if you don’t feel super stable or balance is a challenge in this pose
Try taking a bind—interlace your hands behind your back and fold as normal. Allow gravity to do the work, releasing your shoulders and upper back
Breathe in, breathe out. Repeat.
Happy folding! Give those alignment tips a try on your own and let me know how it goes.
If you want more pose breakdowns like this one, check out my other tutorials below:
Knees-Belly-Chest / Chaturanga
Thanks for reading!
xo
Ally